Basics of Git

Introduction to version control for collaborative development

University of Helsinki

Contents

  • What is Git?
  • Why to use Git?
  • Who should use Git?
  • When to use Git?
  • Where to use Git?
  • How to use Git?
    • Hands on exercises

A common work situation

  • You open a shared folder containing the information of a project you are working together with colleagues.
  • After a couple of months, you need to get back to the analysis.
    • Which one of these files is the one you need to use if you are interested to have the most advanced version of all?
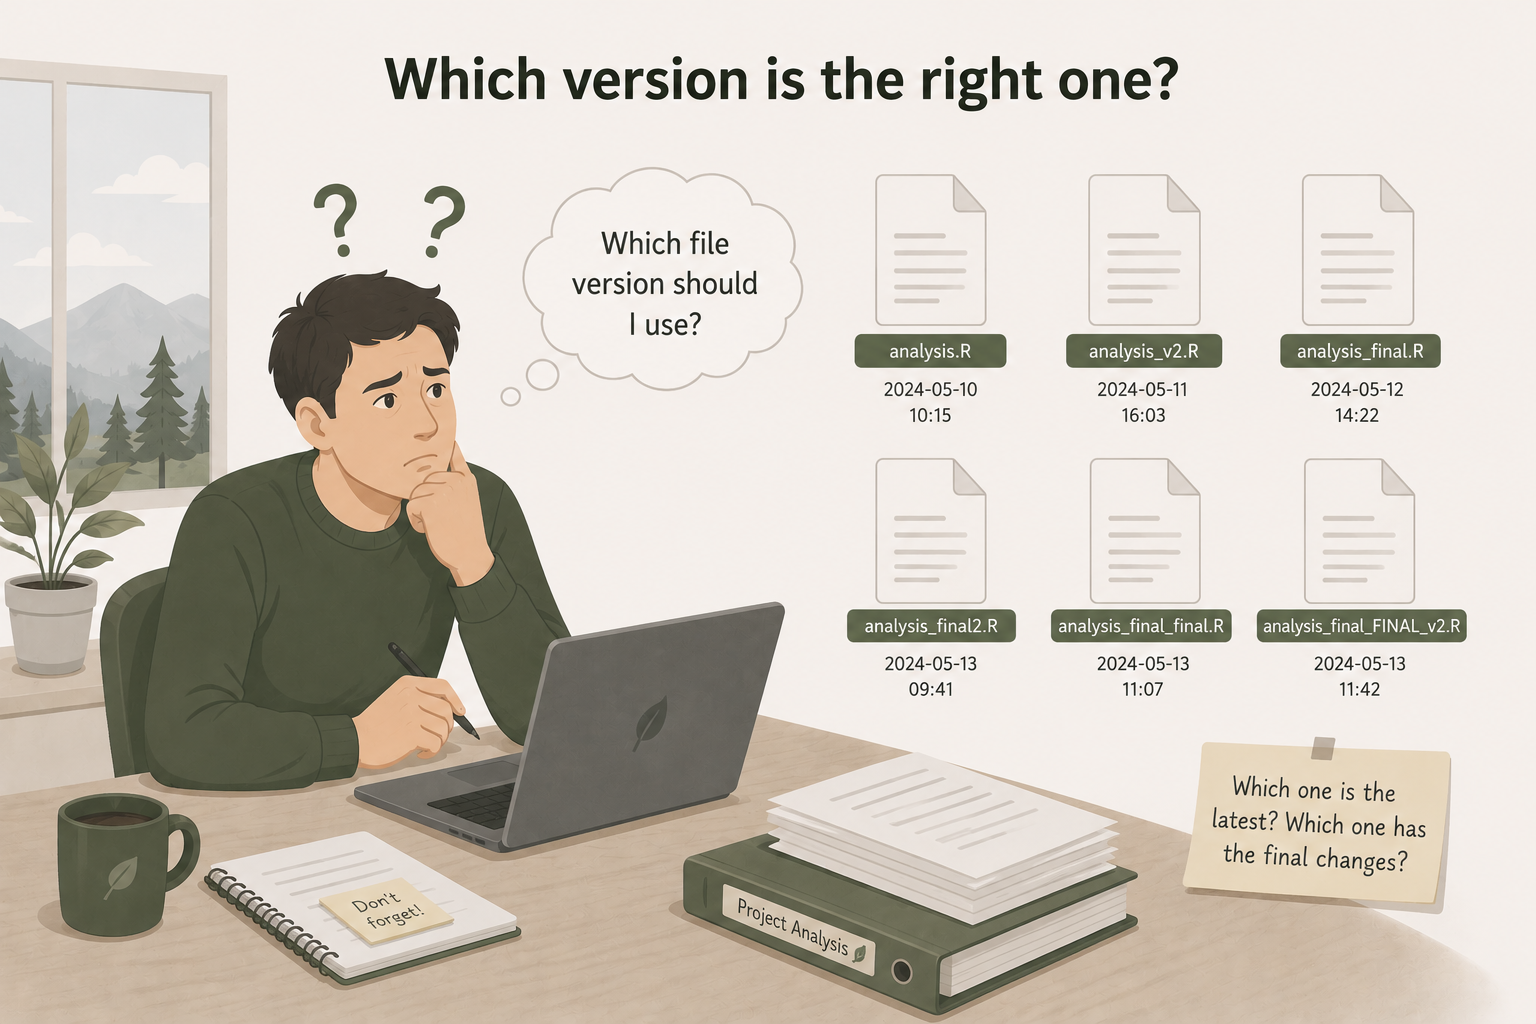
      • analysis.R
      • analysis_v2.R
      • analysis_final.R
      • analysis_final2.R
      • analysis_final_final.R
      • analysis_final_FINAL_v2.R


A common work situation

What could help?

  • Better naming conventions and project data management?
    • YES
  • Git can also be a powerful tool to help you keep track of developments in your project.
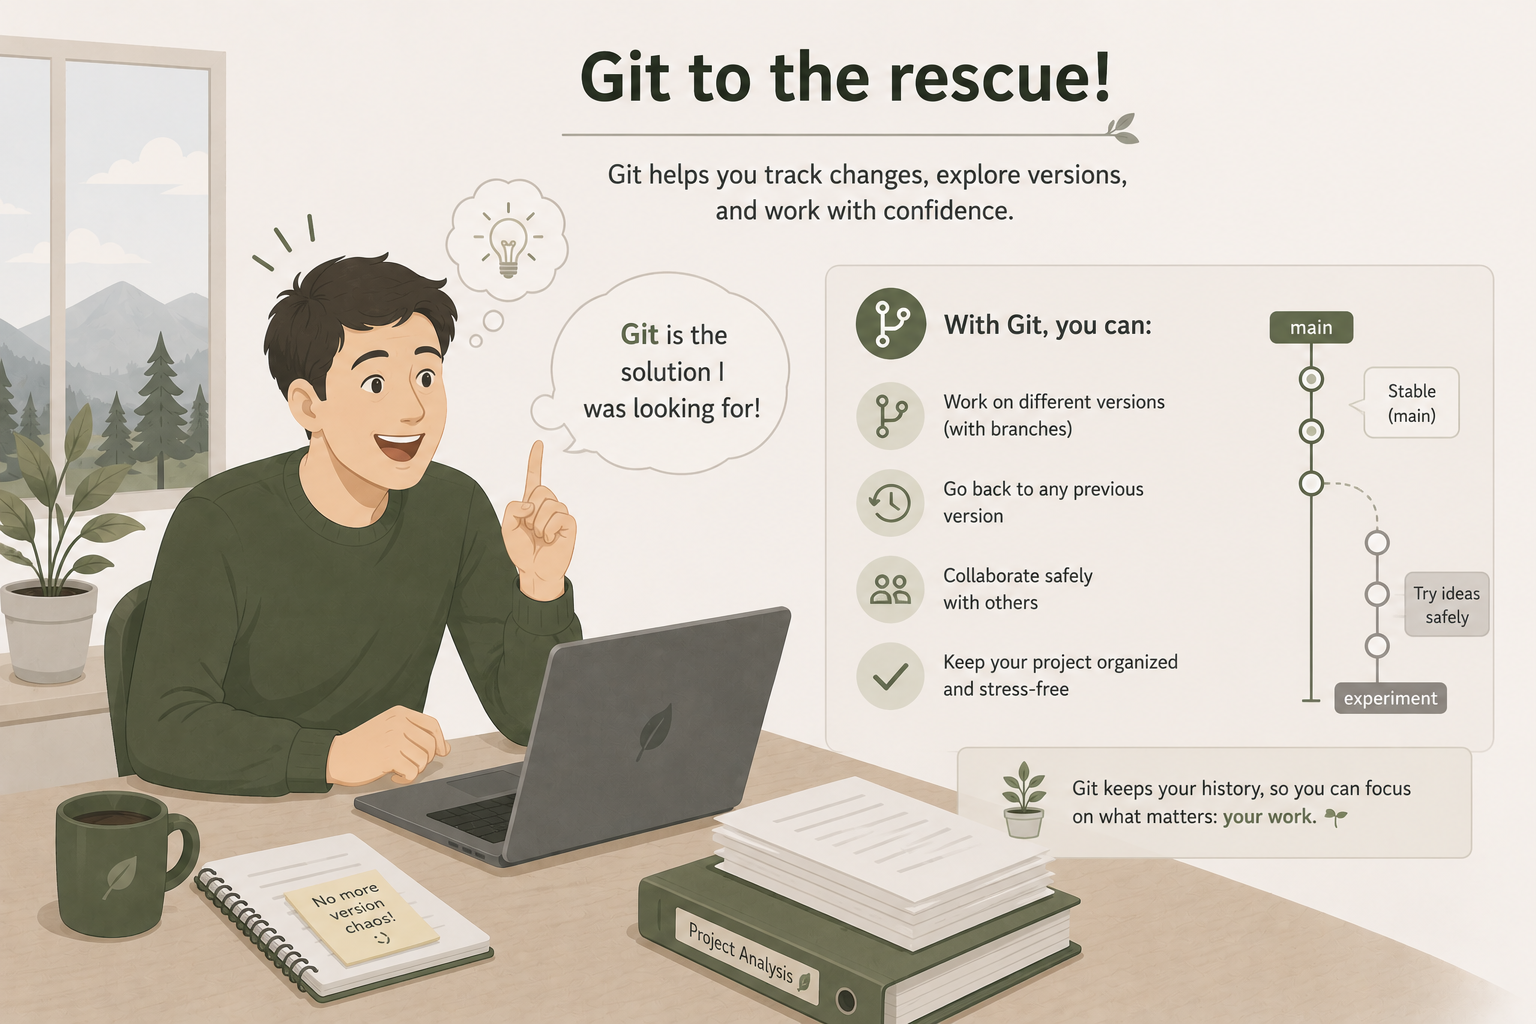
What is Git?

  • Is a software that acts as a version control system used to track changes in files.
  • Helps in collaboration and maintaining the history of project files.
  • Allows you to revert to previous versions if needed.
Why to use Git?

  • Track changes over time.
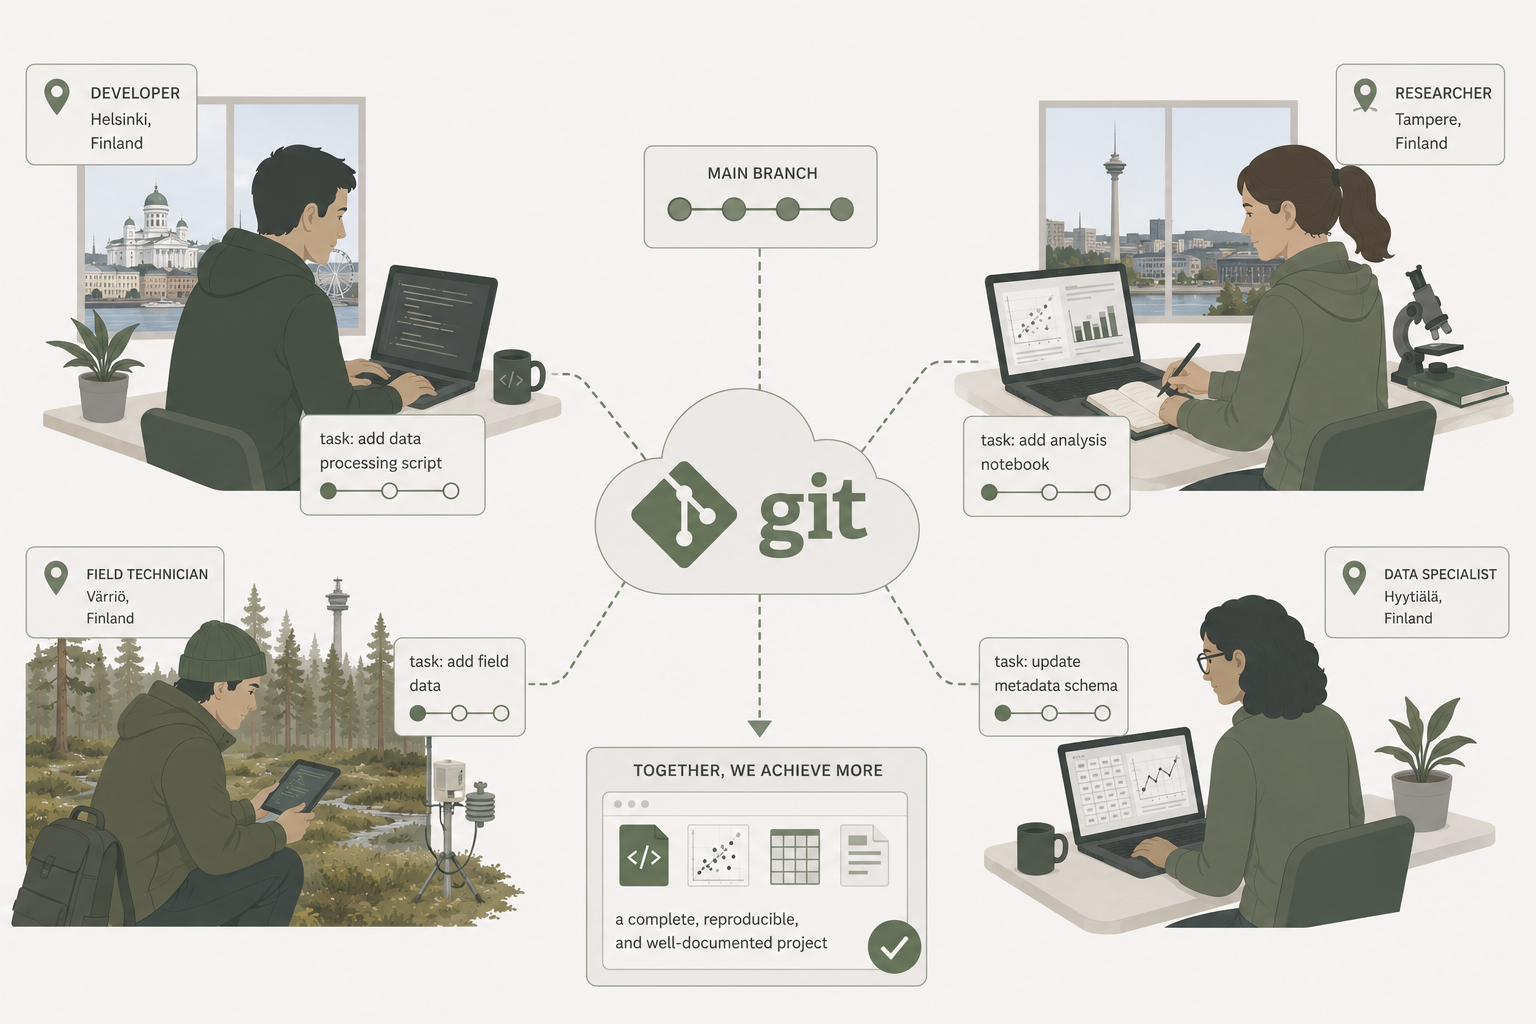
  • Facilitates collaboration.
  • Enables branching for independent development.
  • Increases security by enabling back-up and redundancy.
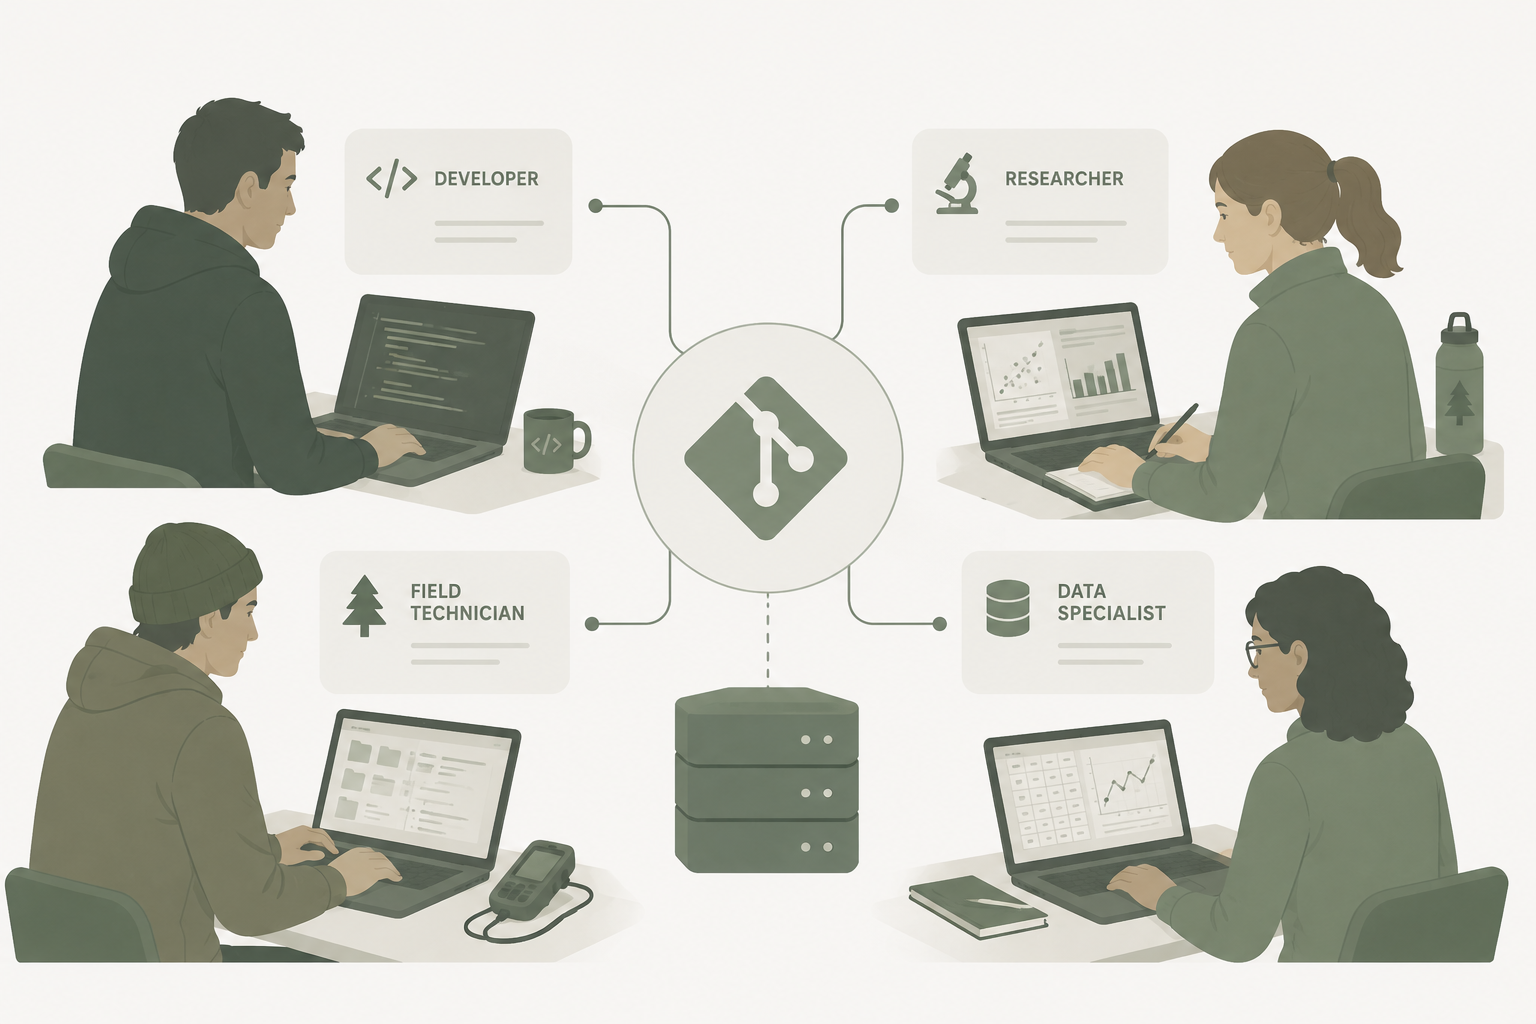
Who should use Git?


  • Developers
  • Data specialists
  • Field and lab technicians
  • Researchers

When to use Git?

  • Starting a new project
  • Collaborating
  • Also when working alone!
  • Experimenting
  • Maintaining history
  • Managing
    • code
    • data pipelines
    • reports


Where to use Git?


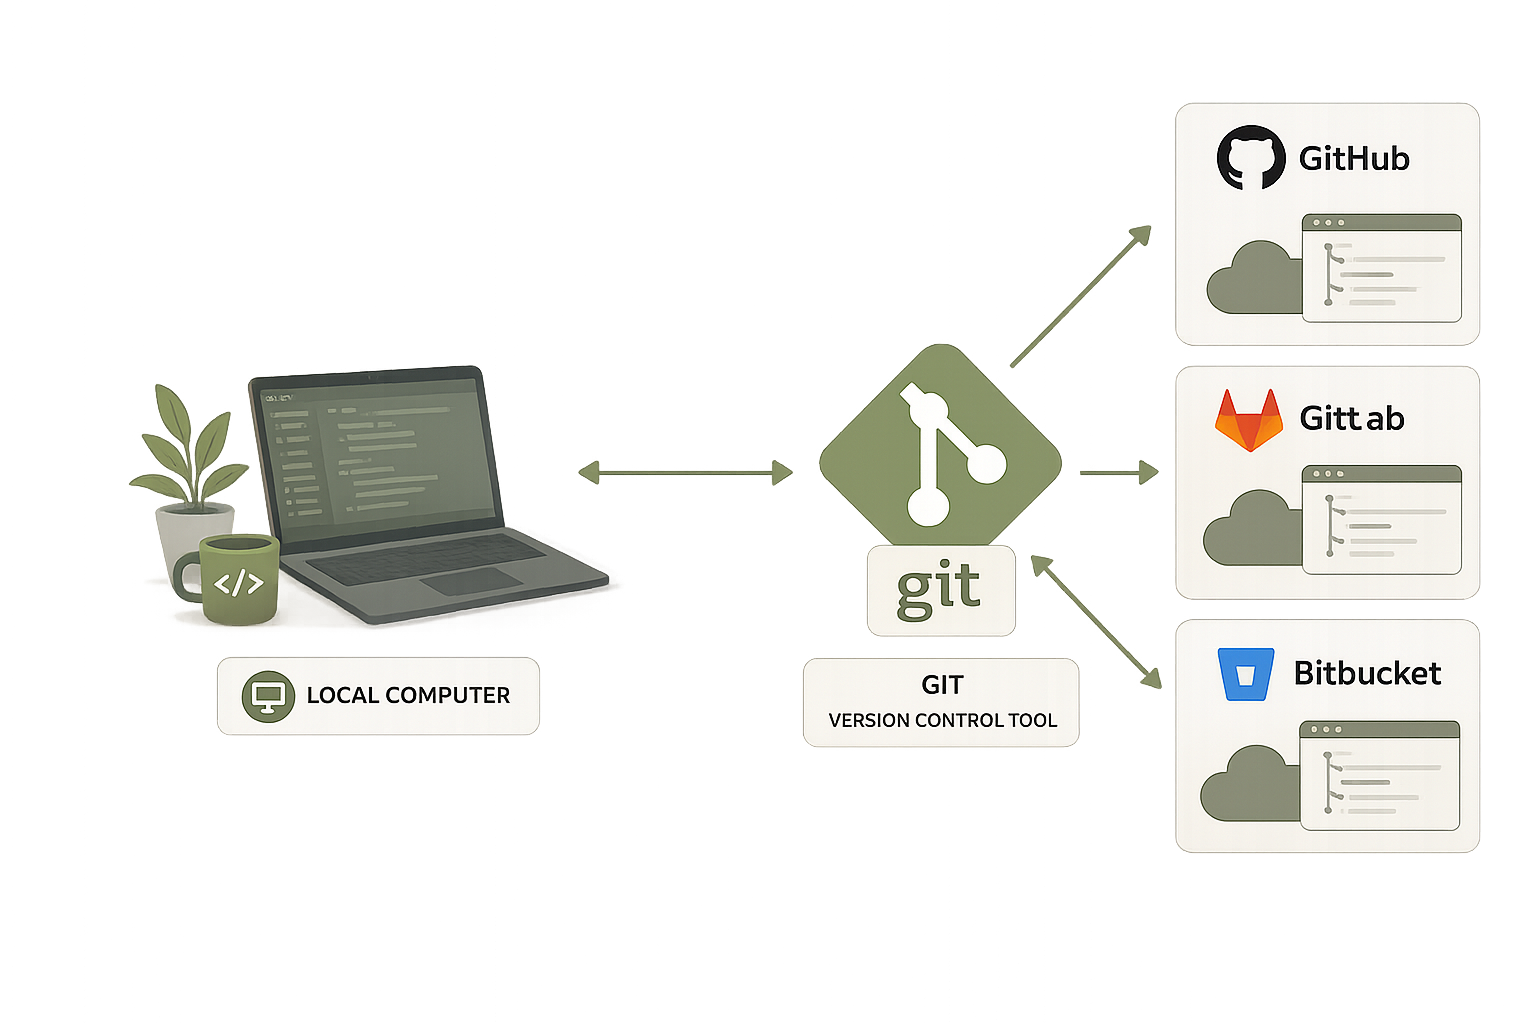
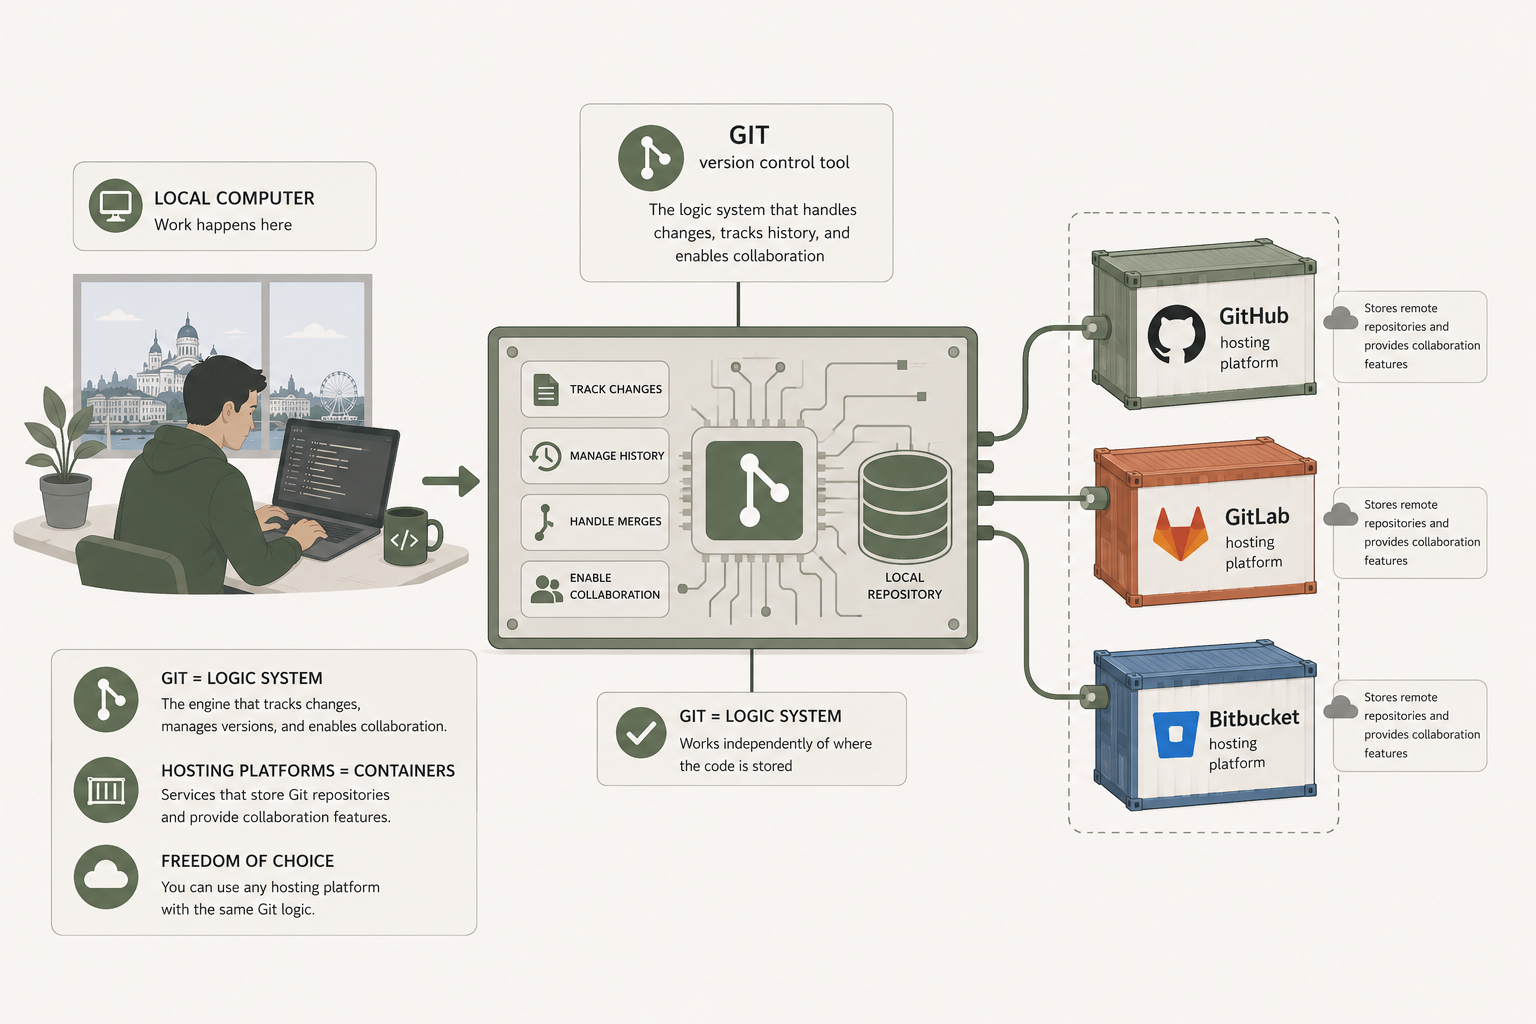
  • local computer
  • GitHub
  • GitLab
  • Bitbucket
  • …

Where to use Git?

Git = version control tool

GitHub/GitLab/Bitbucket = hosting platform

How to use Git?

  • Requirements
  • Important commands
  • Exercises

How to use Git?

Requirements to Have Git Running

  • Operating system agnostic

    • Linux
    • Mac
    • Windows

How to use Git?

Requirements to Have Git Running

  • Installation is required
    • UH computers might have it installed by default
  • Installing git in different operating systems:
    • Linux: Install via package manager (e.g., sudo apt-get install git).
    • macOS: Install via Homebrew (brew install git) or Xcode Command Line Tools.
    • Windows: Download installer.
  • Git website: https://git-scm.com/

How to use Git?

How to use Git?

Configure User Identity

  • Set your name and email (used in commits):
git config --global user.name "Your Name"
git config --global user.email "you@example.com"
  • HTTPS

    • Use your username and password when prompted.
  • SSH

    • Instructions to set up the SSH can be found in the following links:
  • You can also access the contents by the ZIP file

    • Download Zip file

How to use Git?

Git most common workflow and commands

  • Update Your Local Repository

  • Make changes

    • Create, modify, or delete files in your working directory.
  • Stage changes

    • Add new or modified files to the staging area

How to use Git?

Git most common workflow and commands

  • Commit changes

    • Record your staged changes with a descriptive message

  • Share changes

  • Check repository status

How to use Git

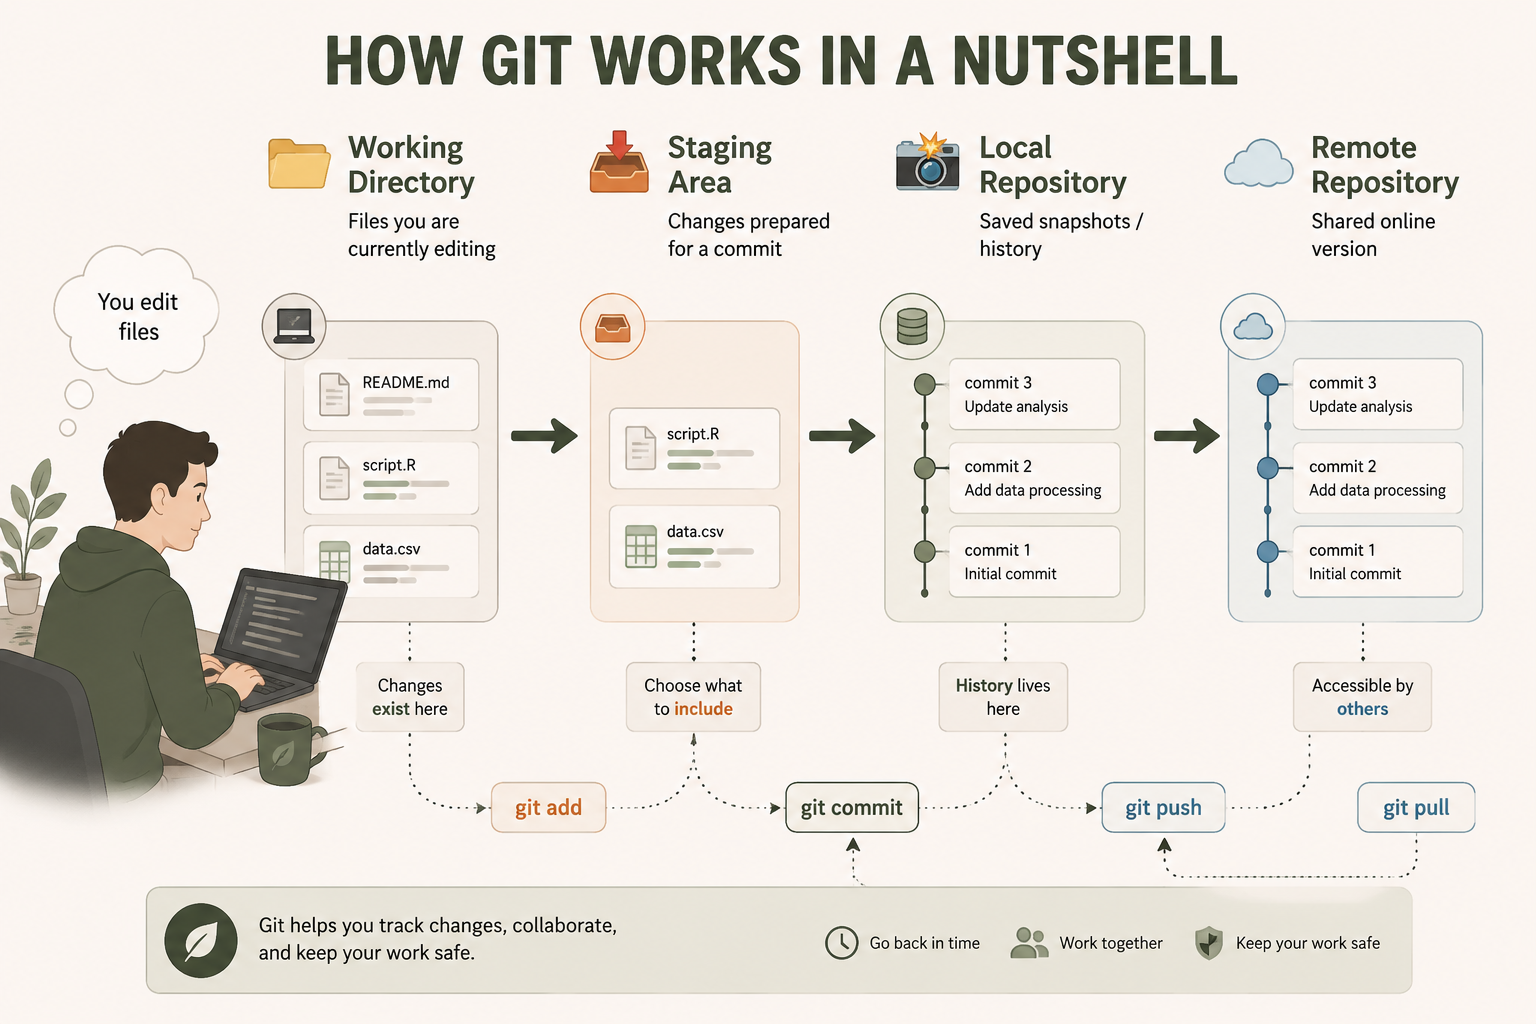
In a nutshell

  • Working directory
    • Files you are currently editing
  • Staging area
    • Changes prepared for a commit
    • command: git add
  • Local repository
    • Saved snapshots/history
    • command: git commit
  • Remote repository (e.g. GitLab/GitHub)
    • Shared online version
    • commands: git push / git pull


How to use Git?

Git basic commands

  • git init - Create an empty Git repository or reinitialize an existing one.

  • git clone - Clone a repository into a new directory.

  • git add - Add file contents to the index.

  • git commit-m "message" - Record changes to the repository with an associated message.

  • git push - Update remote refs along with associated objects.

  • git pull - Fetch from and integrate with another repository or a local branch.

How to use Git?

Git basic commands

GitLab

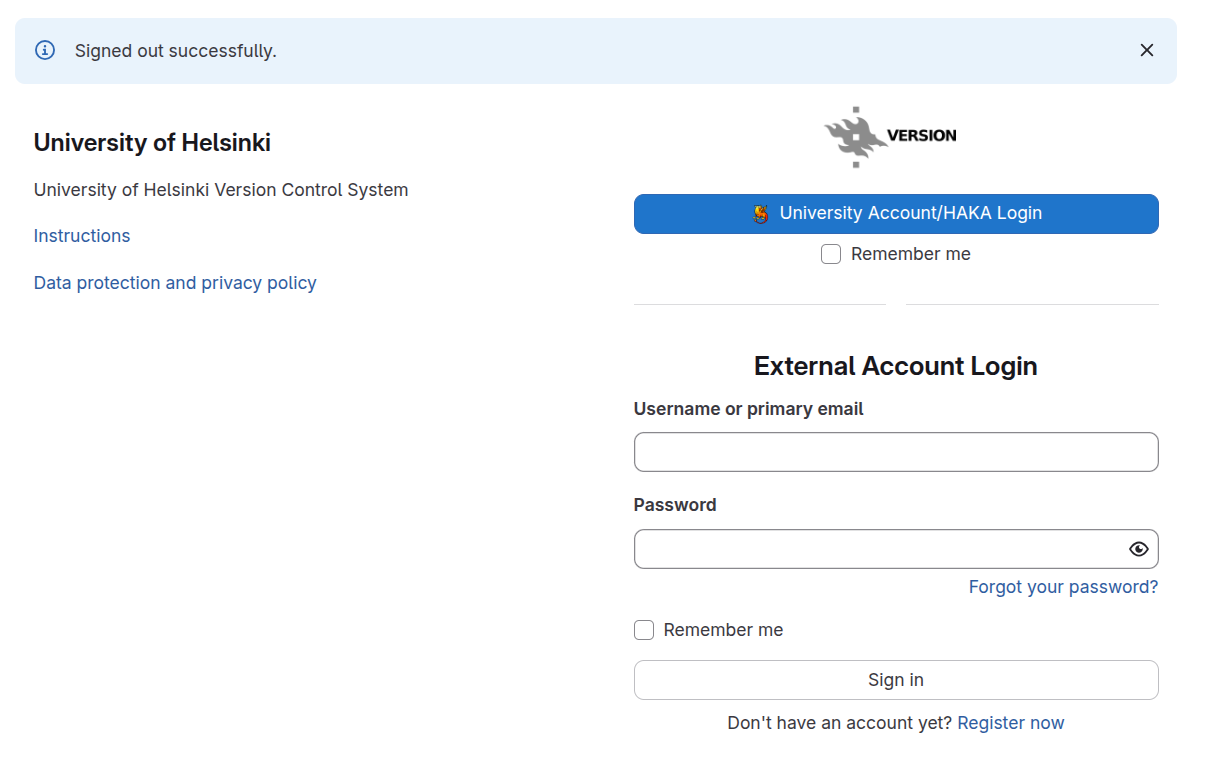
University of Helsinki solution

University of Helsinki Version Control System

Loging in with HAKA
GitLab

Creating a new repository

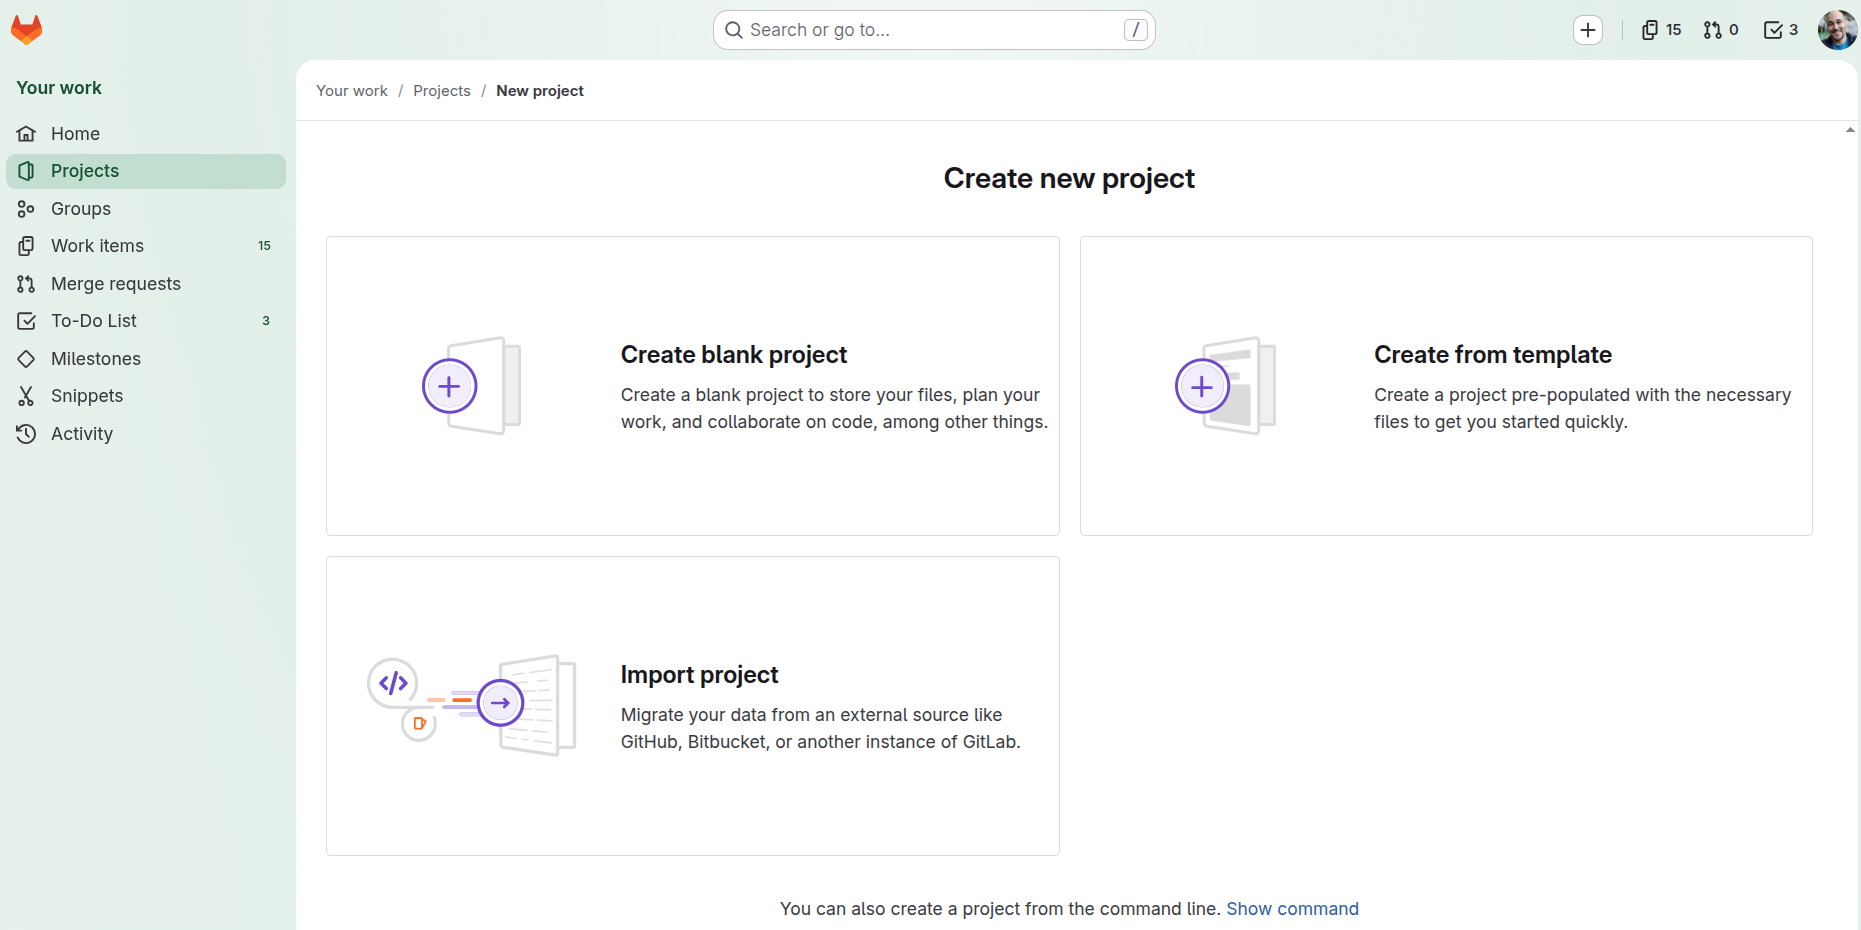
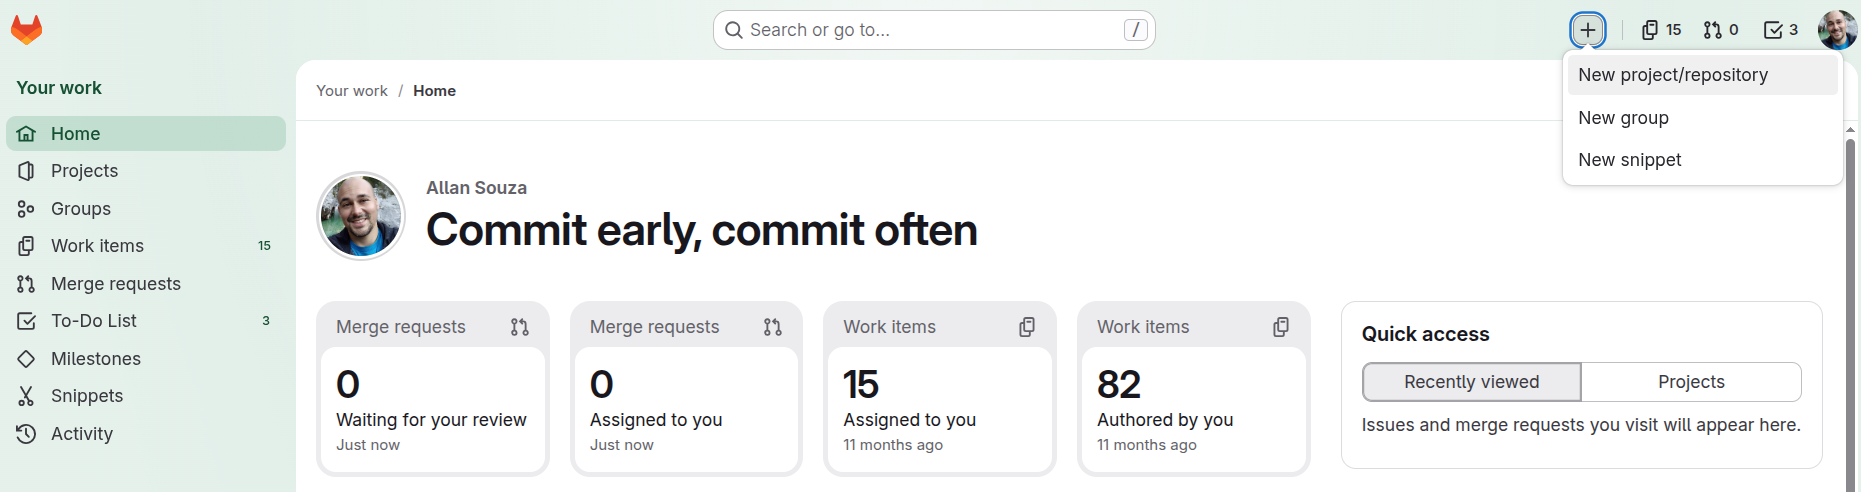
Go to the + symbol and click on New project/repository
GitLab

  • Different options
    • Create blank project
    • Create from template
    • Import project

GitLab

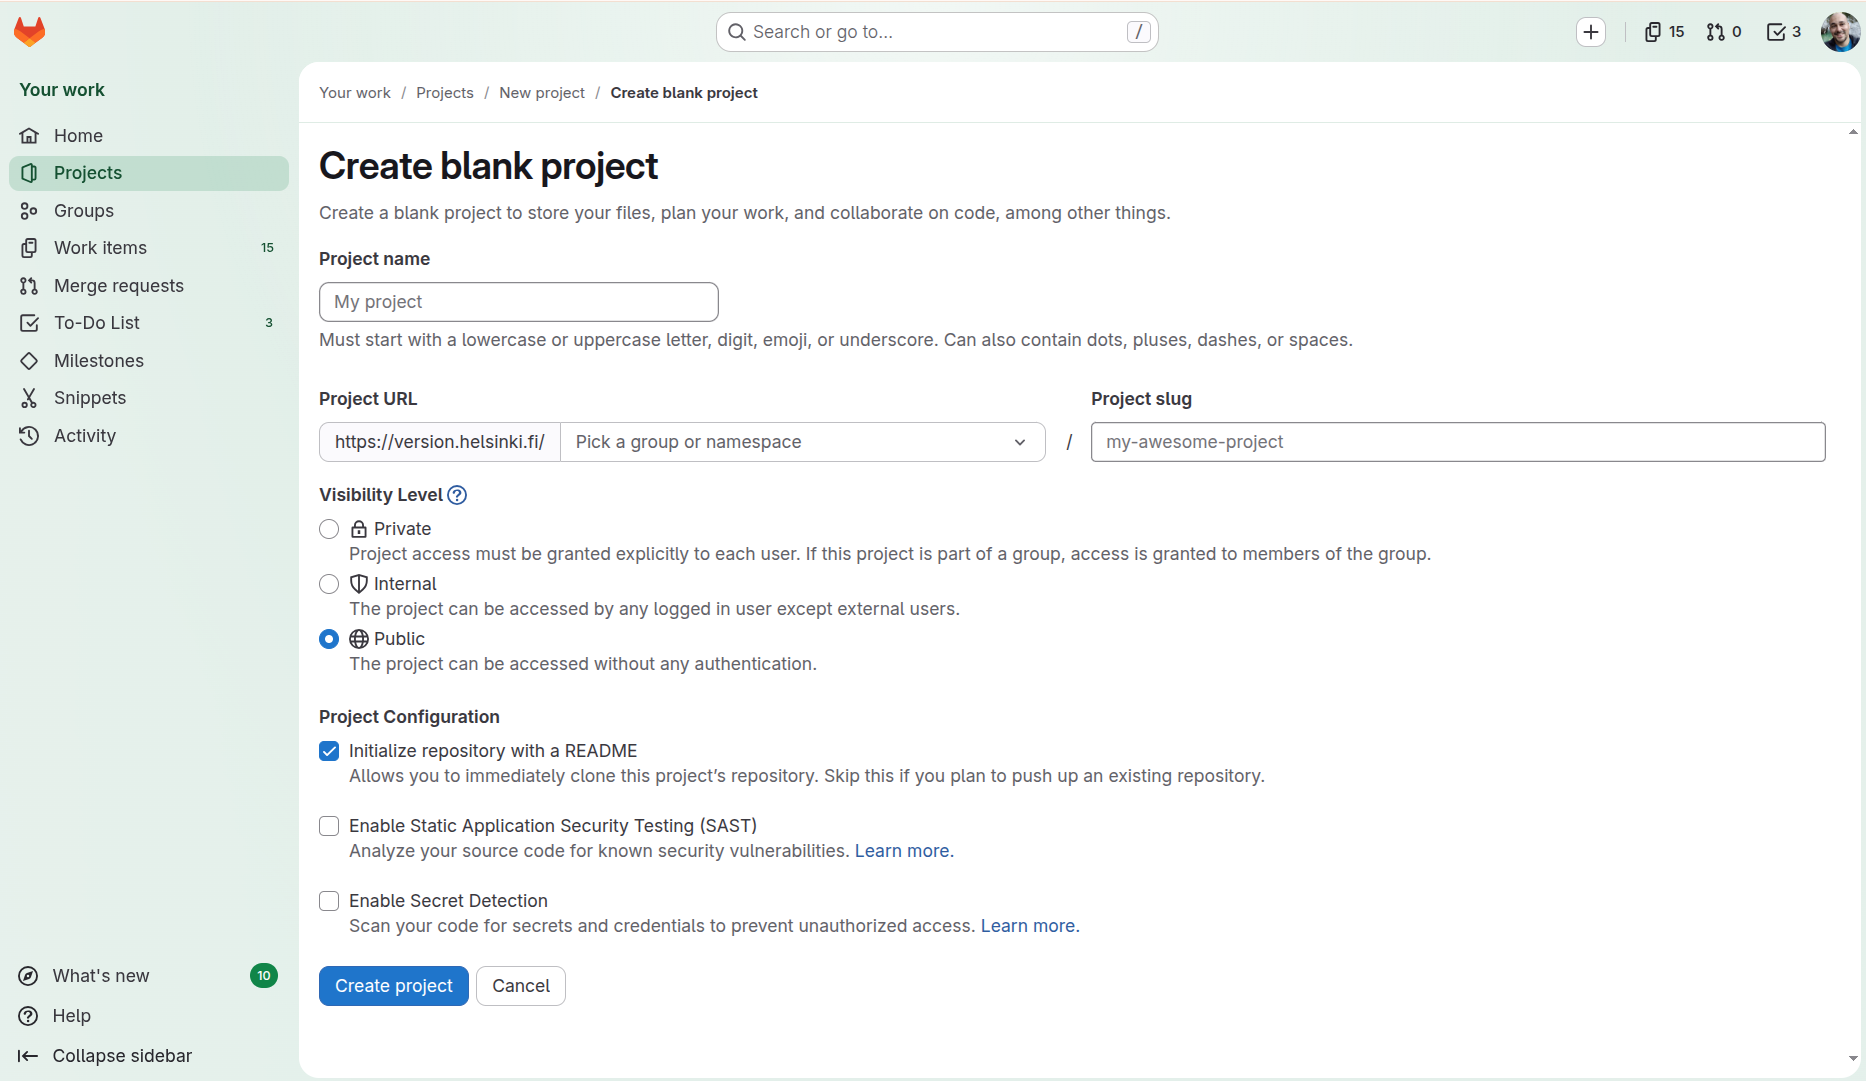
  • Project name
    • Automatically taken as your Project slug
  • Project URL
    • Can be your username in the system (dropdown)
  • Project slug
    • Specific name of the repository
  • Visibility level
    • Private, Internal or Public
  • Project configuration

GitLab

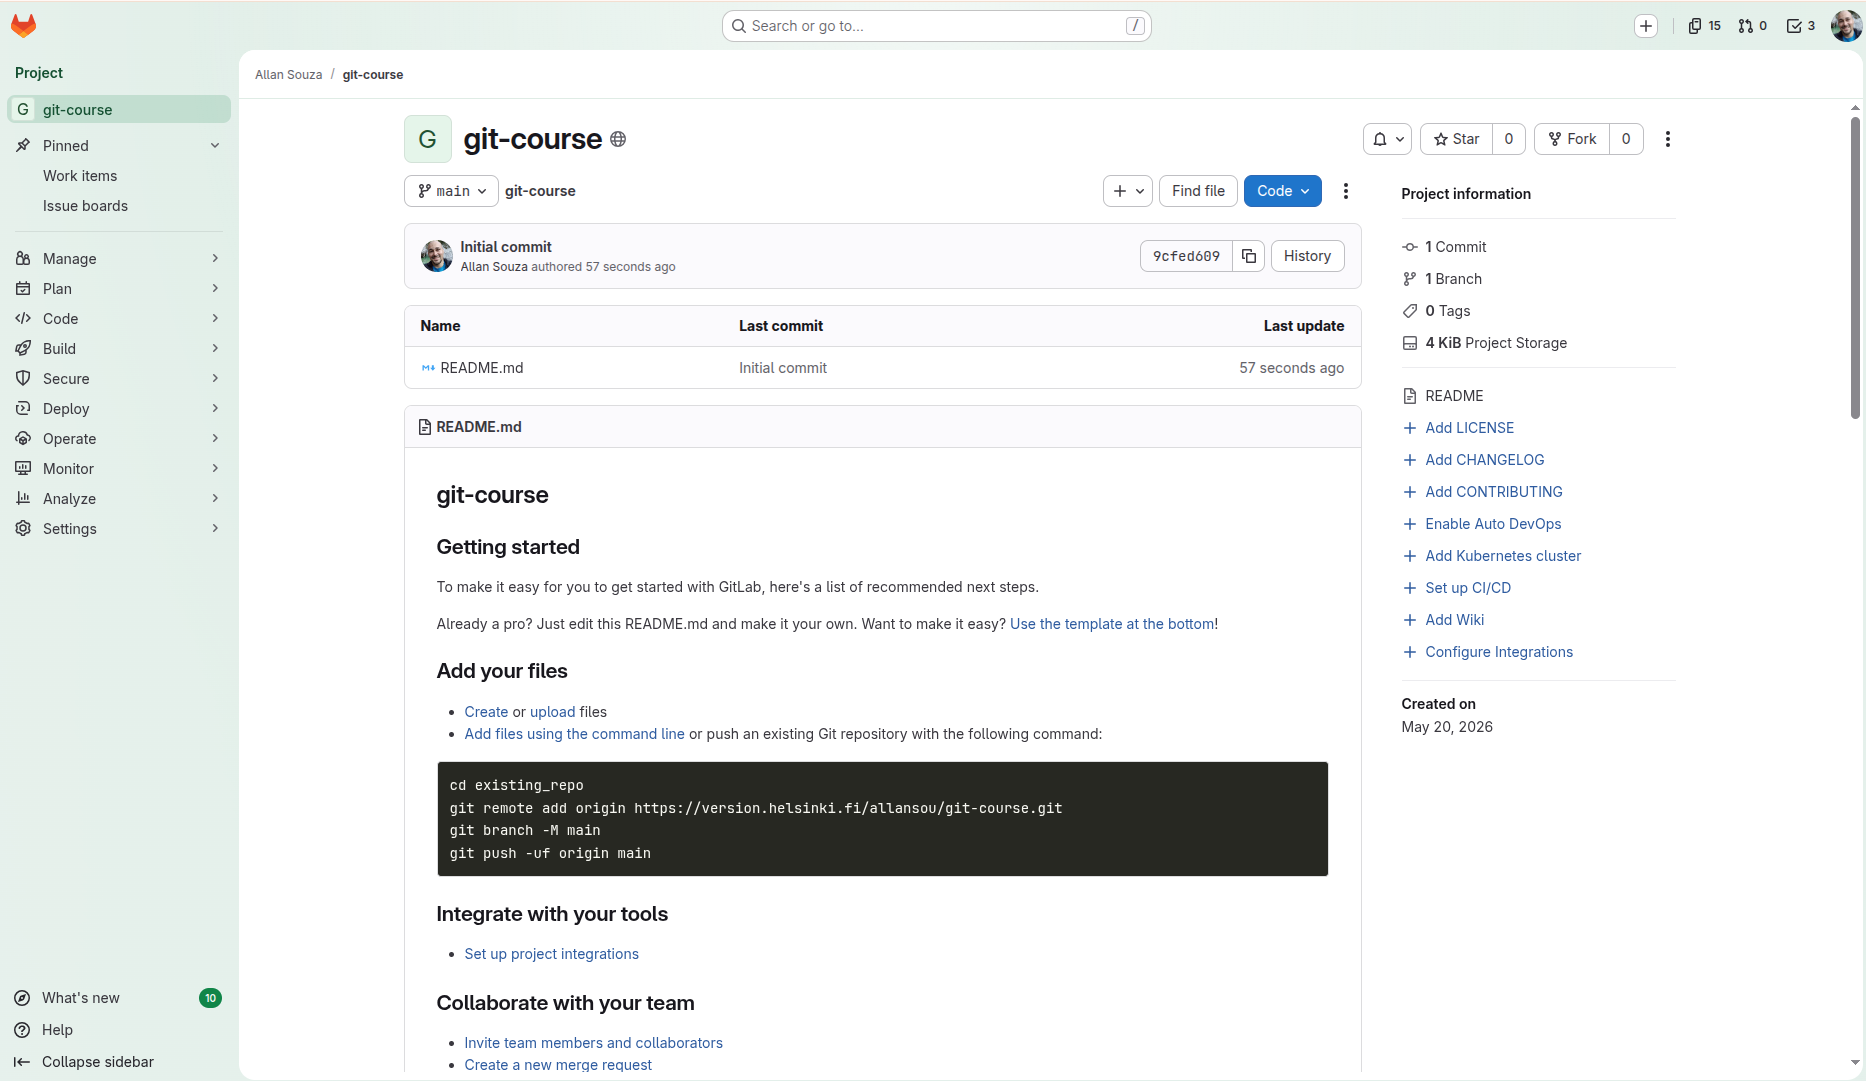
Repository created
Exercise #1

  • Log in to UH’s GitLab using HAKA
  • Create a new repository in GitLab
    • Provide an understandable and clear name for your repository
You have 5 minutes!

GitLab

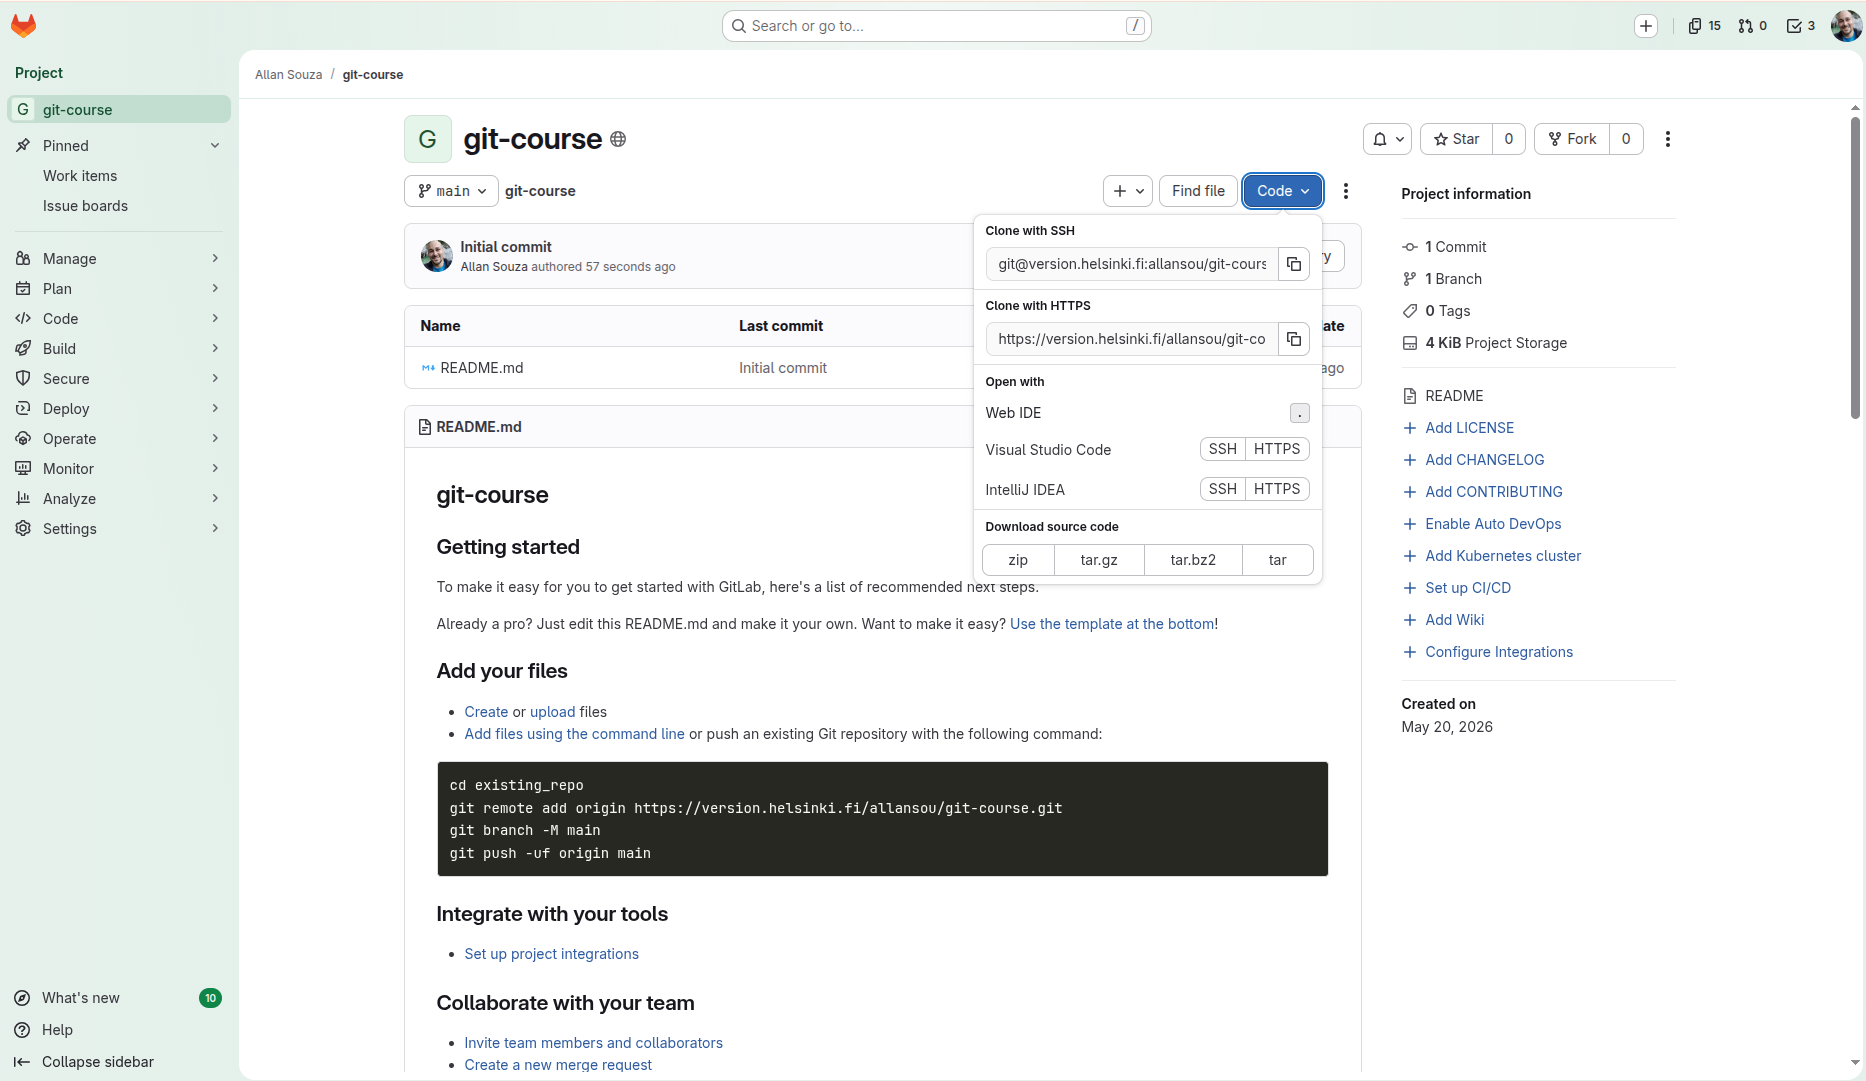
Cloning the repository

  • Different options
    • Clone with SSH
    • Clone with HTTPS
    • Download source code
      • Not cloning!

GitLab

Cloning

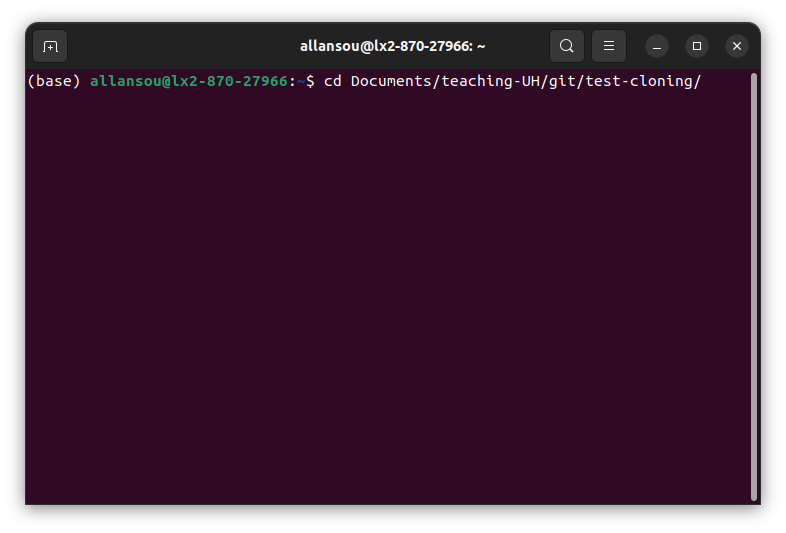
In your computer terminal go to the folder you want to clone the repository.

  • My example:
cd Documents/teaching-UH/git/test-cloning/

GitLab

Cloning

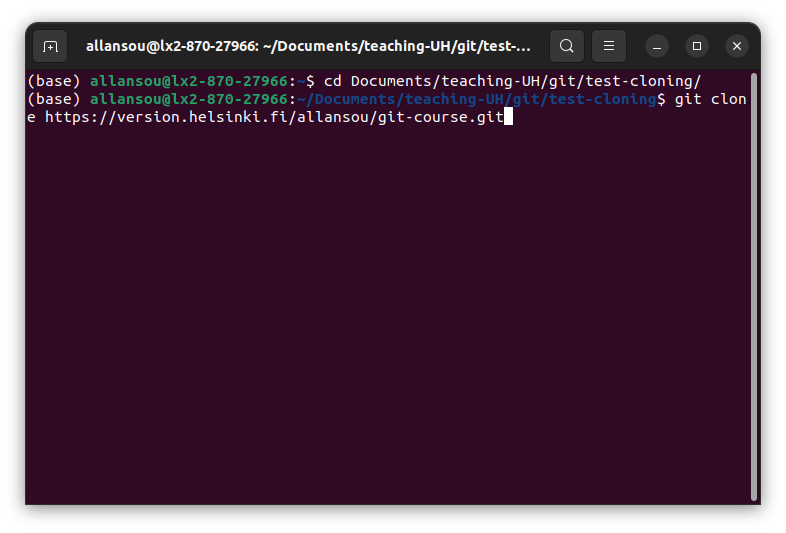
In your computer terminal write the git clone command followed by the repository URL (HTTPS).

  • My example:
git clone https://version.helsinki.fi/allansou/git-course.git

Exercise #2

  • Clone this repository:
https://version.helsinki.fi/allansou/git-course.git
  • Verify if you have the folder and files in your local computer

You have 3 minutes!

GitLab

Branches

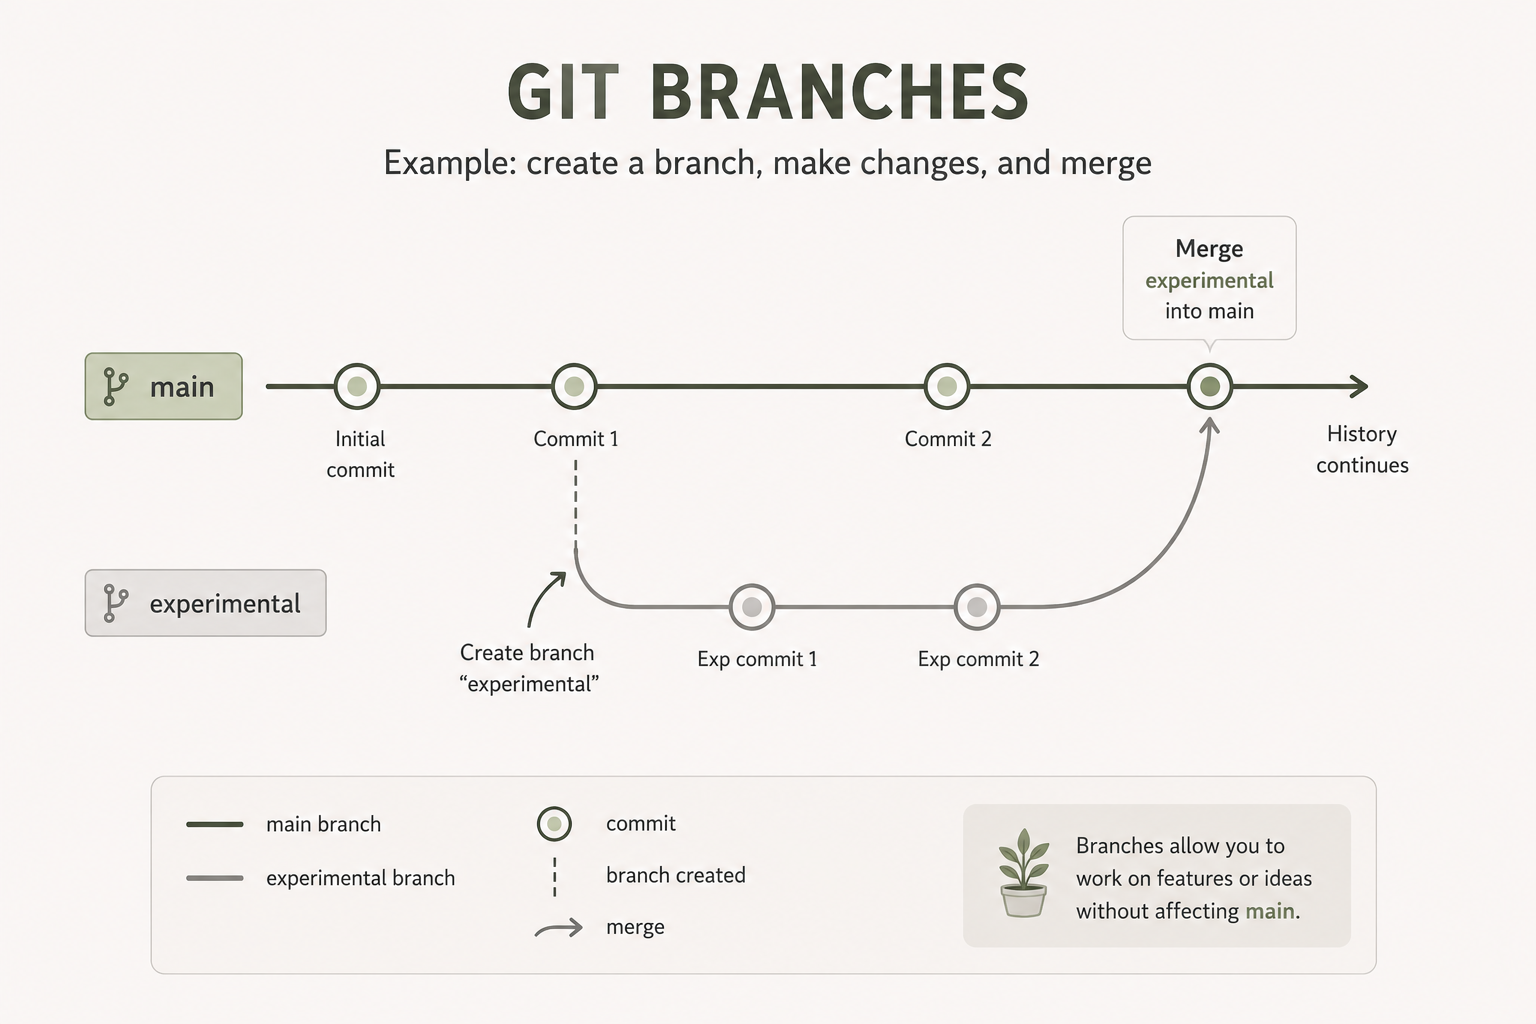
  • Branches allow you to safely work in isolation without affecting the main project
  • The default branch in Git is called main
  • Empowers parallel development without conflicts between versions
  • Branches can be created for the work of a new feature or bug fix, for instance.
GitLab

Branches
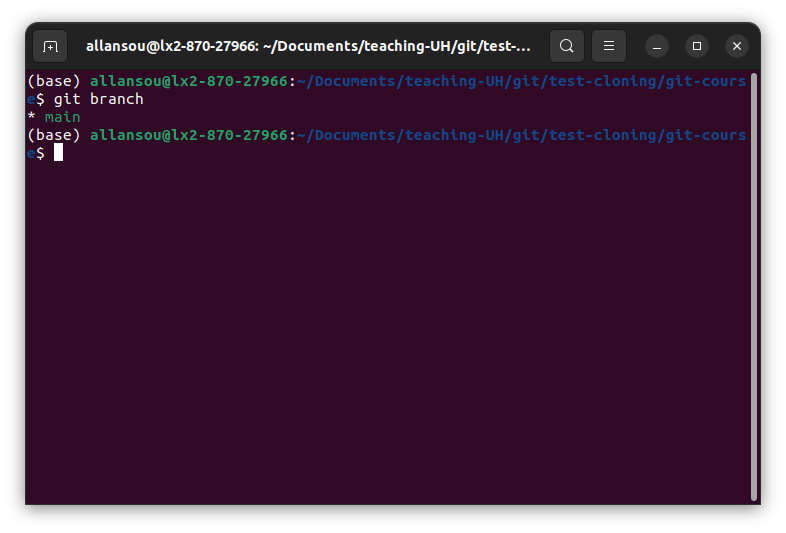
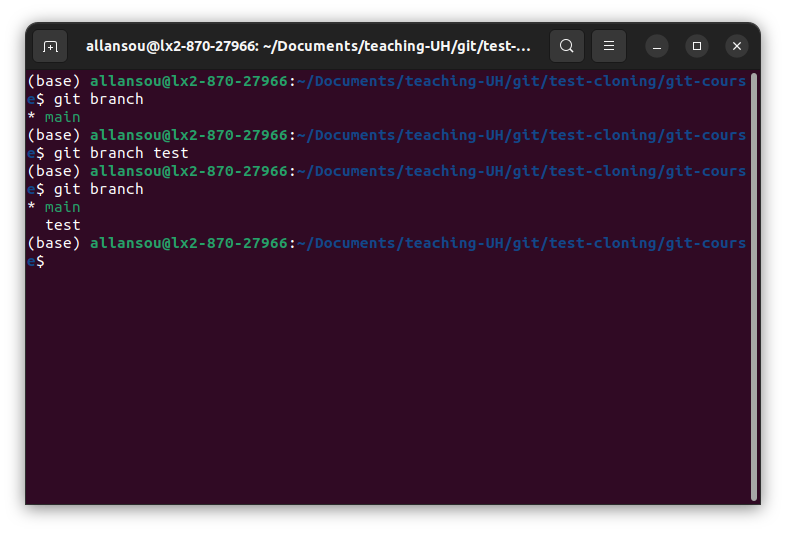
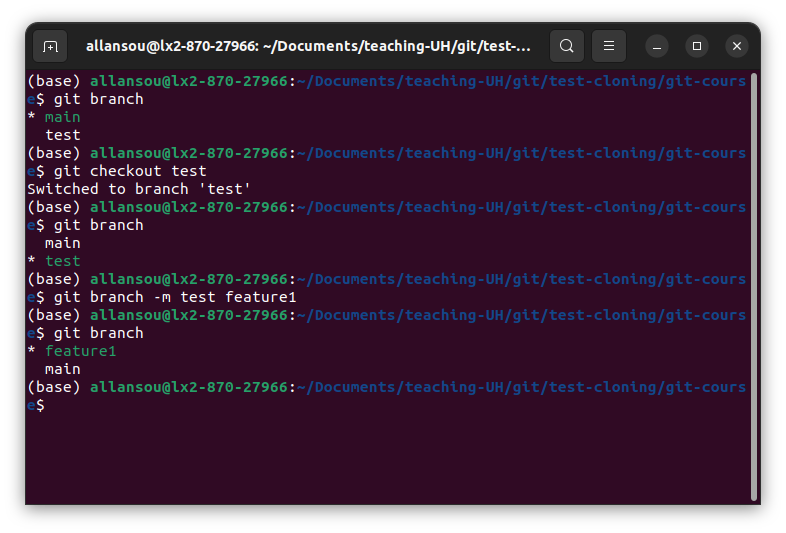
Verifying the existing branches in the repository:

  • On the folder containing a git project, run:
git branch
  • This will return the branches in the project

GitLab

Branches

Creating a branch is easy, you just need to use the command git branch followed by the name of your new branch.

git branch test

You can confirm the existence of the newly created branch by using the git branch command again:

git branch

GitLab

Branches

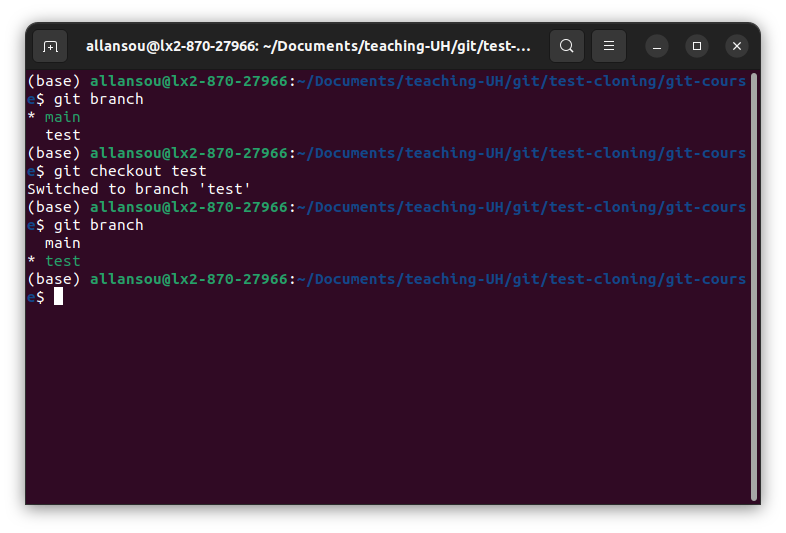
With the new branch created, it is time to start working in it. To do that first we need to check it out (move to it) using the command git checkout.

git checkout test

GitLab

Branches

You can also change the name of your branch if you want it. To do so you need to use the branch command, add a message flag (-m), the current branch name and the new branch name:

git branch -m test feature1

GitLab

Branches

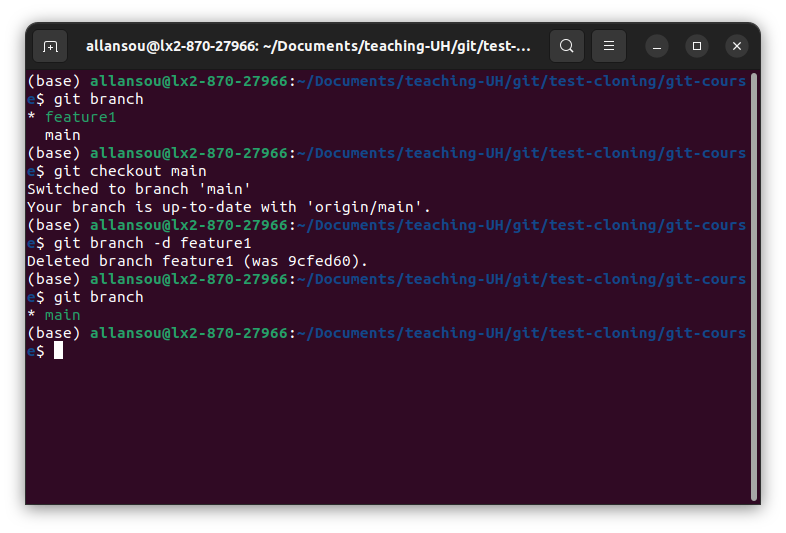
If you want, you can easily delete a branch too. To do so, you need to checkout to another branch, then delete it.

Returning to the main branch:

git checkout main

Delete the created branch using the -d flag:

git branch -d feature1

Check the branches you have now:

git branch

Exercise 3

  • Create a new branch
  • Change to your newly created branch
  • Rename your branch
  • Delete your branch

You have 5 minutes!

GitLab

Editing files
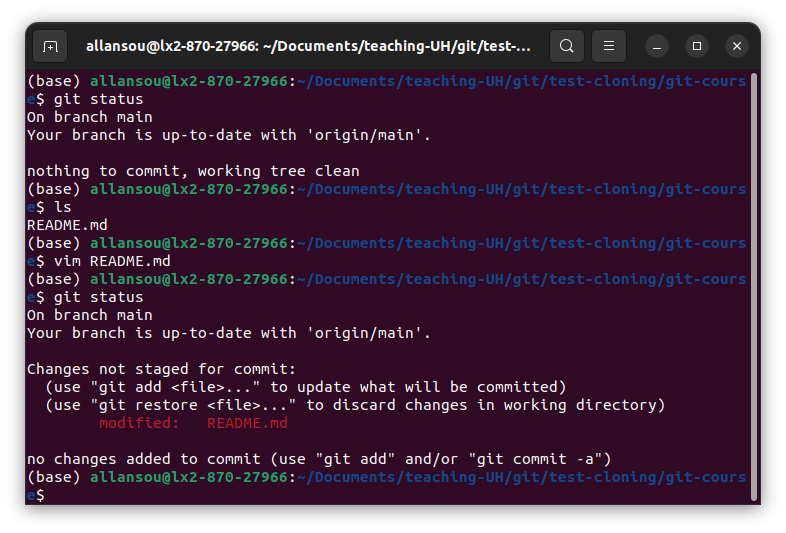
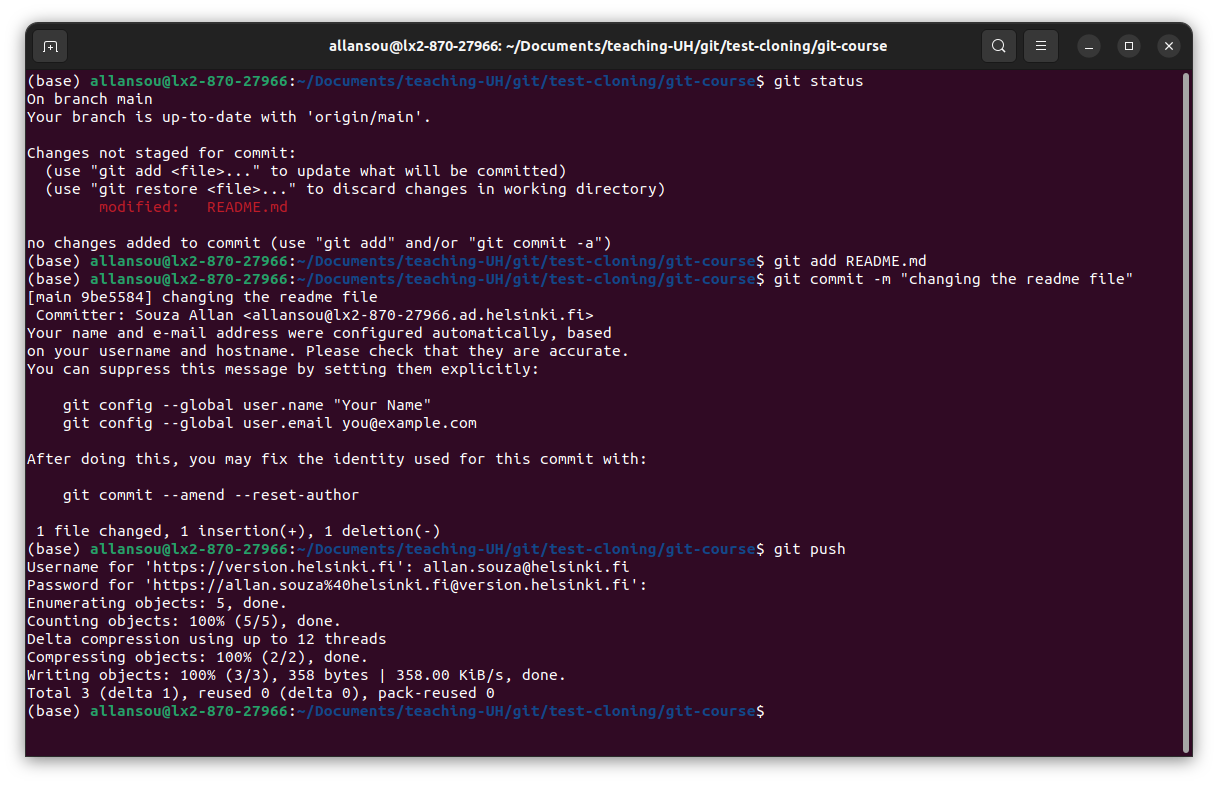
We can check the status of our git project:

git status

We can list the files we have in our working directory:

ls

We can open the file we have in our working directory using an text editor (e.g. vim, vi, nano):

vim README.md

In Vim, we can edit our file and save it:

Press Esc and type :x

GitLab

Editing files

We can check the status again and verify that we need to do something called add. This will tell git to stage the change we did.

git add README.md

Then we need to commit the staged change:

git commit -m "changing the readme file"

Finally we need to push the change to the remote repository.

git push

GitLab

Editing files

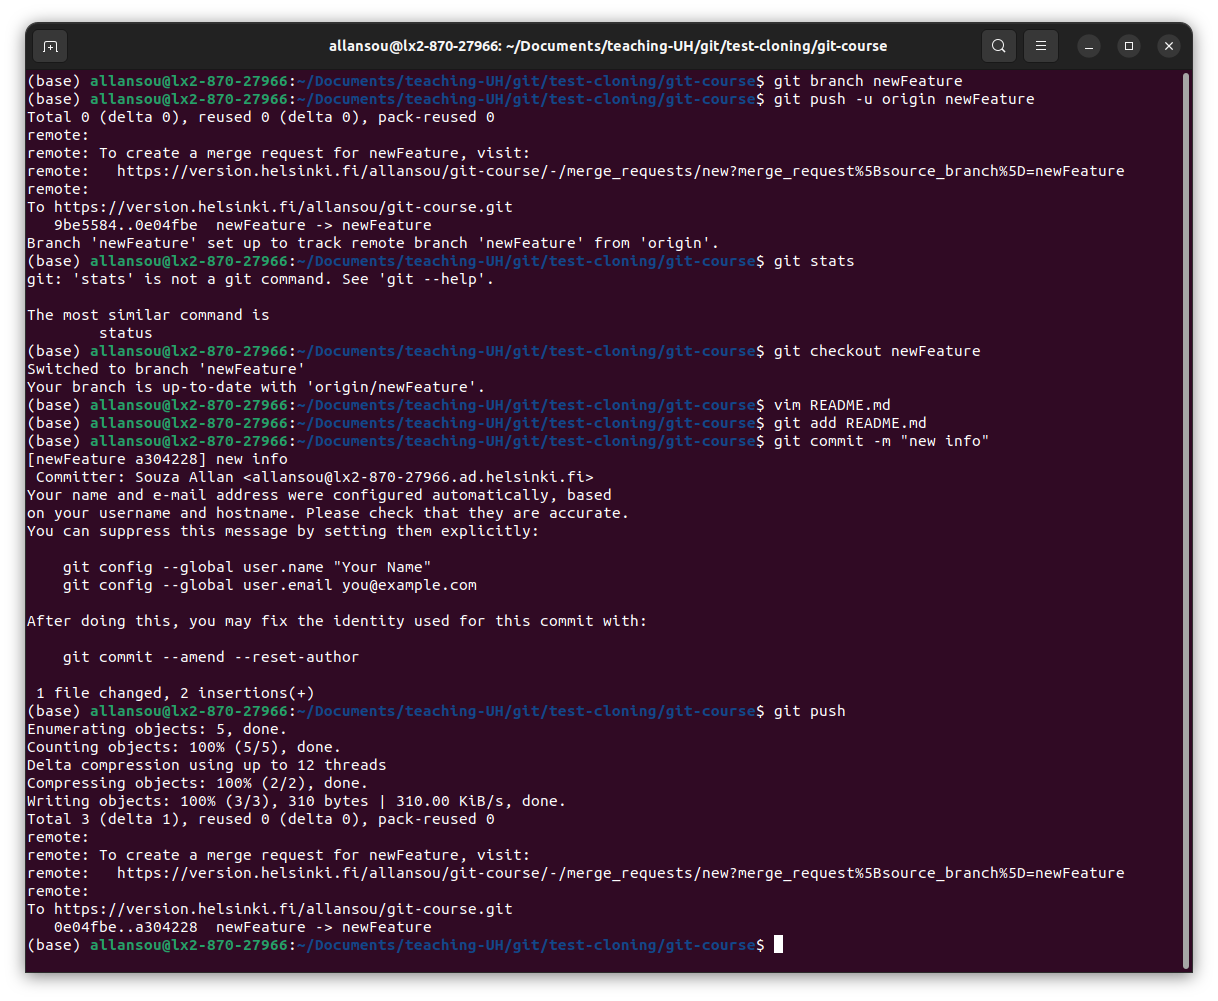
Adding a new branch:

git branch newFeature

Push the new branch

git push -u origin newFeature

Checkout the new branch

git checkout newFeature

Editing the file

vim README.md

Add, commit and push the change

git add README.md
git commit -m "new info"
git push

GitLab

Merging branches

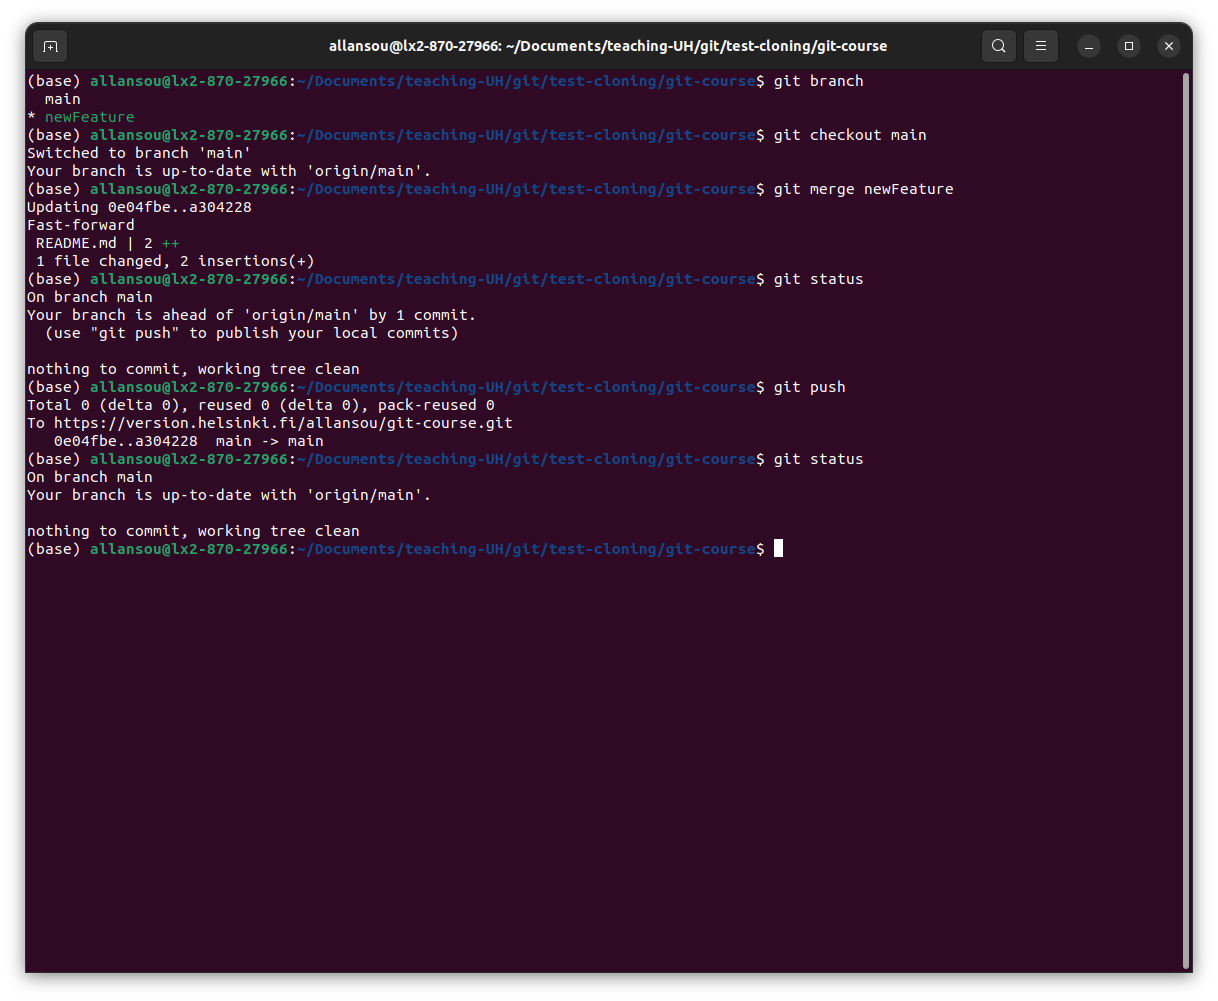
Checkout to the main branch

git checkout main

Merging the branch newFeature to main

git merge newFeature

Pushing the change to the repository and checking the status

git push
git status

Exercise 4

  • Create a new branch
  • Change to your newly created branch
  • Make a change in the README.md file
  • Push your change to the repository
  • Merge the new branch to the main branch

You have 10 minutes!

GitLab

Logs
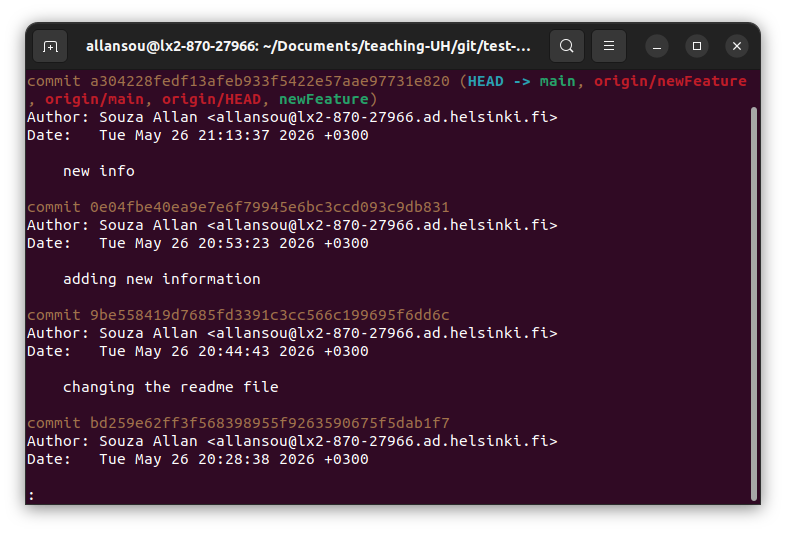
Git automatically keeps a history of all committed changes.

  • We can check the history of commits using the using following git command:
git log

GitLab

Logs

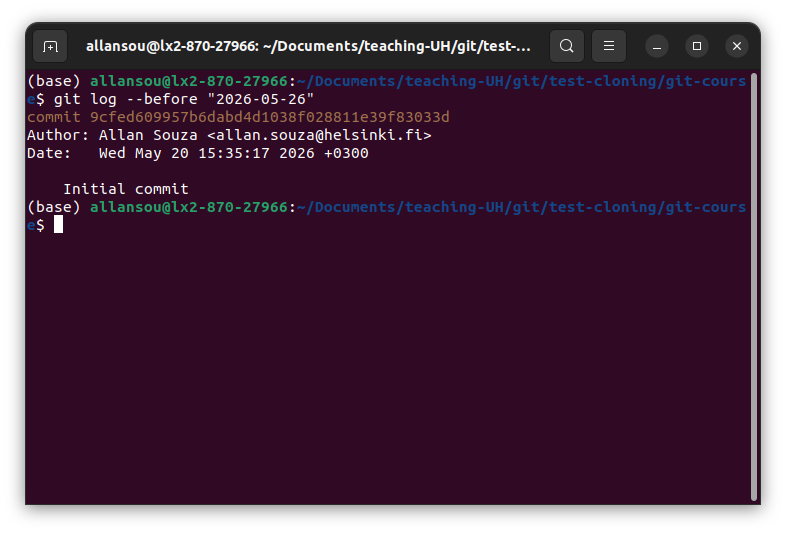
You can search among all logs in your project:

  • By order
git log -1
  • By author
git log --author=Allan
  • By datetime
git log --before "2026-05-27"

GitLab

Logs

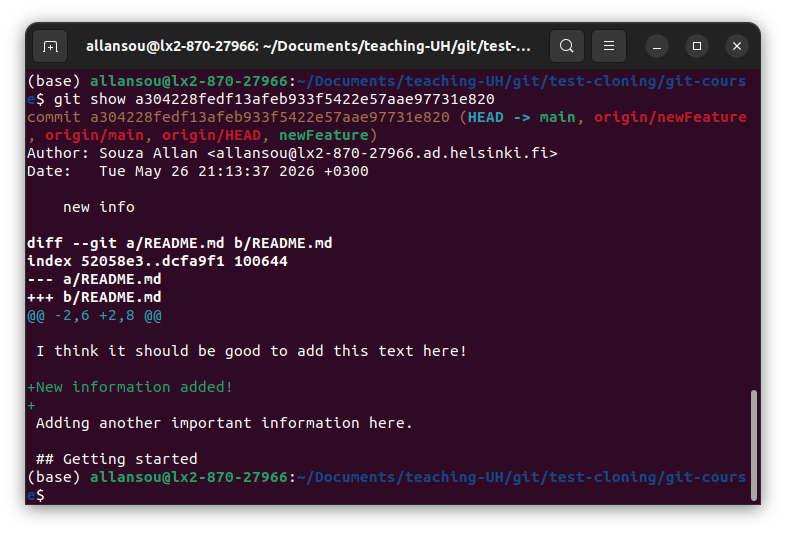
Git allows you to actually go a little bit more in detail on the changes applied in a specific commit using the git show command:

git show

You can use the commit ID to check exactly what happened in a specific commit:

git show a304228fedf13afeb933f5422e57aae97731e820

Exercise 5

  • Search the commits done by you today
  • Identify the commit ID of your last commit
  • Display the changes you did in this last commit

You have 3 minutes!

Supporting Materials

Online Courses

Interactive Tutorials/Games